Mirrorlite™ Vertical Mirror Rolling Stand Assembly
Glassless Mirror Stackable Stand - Vertical
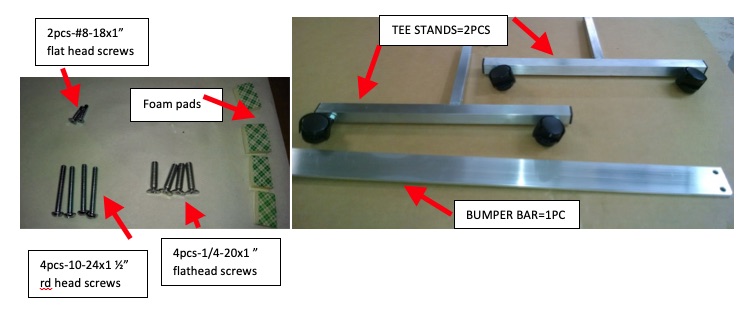
Components List:
Assembly:
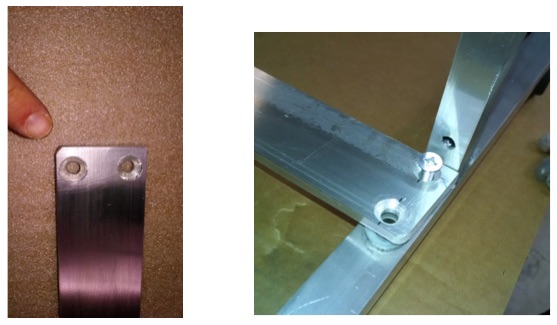
1) Attach foam pads above and below mirror mounting holes on T-stands.

2) Locate “Bumper Bar” and ¼” Flathead screws. Place round corner outwards above threaded inserts on T-stands stop with counter sinks facing up.
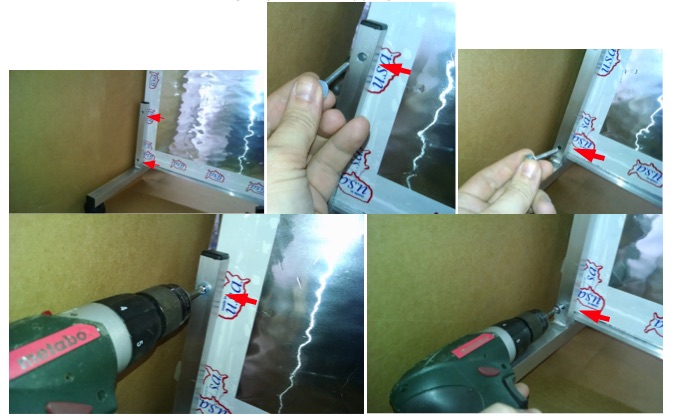
3) Peel back mirror protective film from threaded inserts indicated by red tape flags at corner of mirrors to connect to stand. Start the 10-24 x 1-1/2” screws by hand to find the threads, then tighten with driver on medium clutch setting to prevent stripping screws.
4) Carefully tip the mirror and stand on its side, showing the bottom of the bumper bar. Drill drive the #8-18 flat head screws in the countersunk holes on bumper bar. Do not over tighten or strip. Set clutch on drill half the full strength setting.
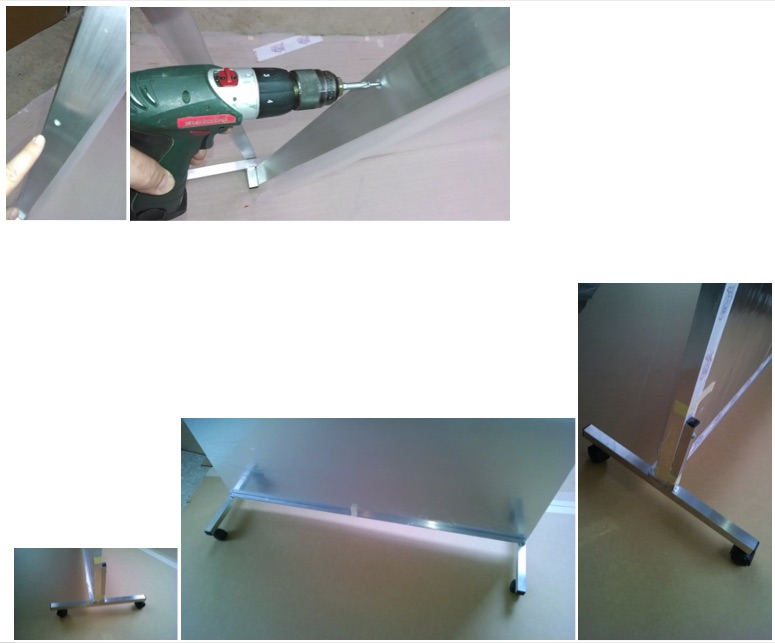
Complete mirror.